Electromagnets


This week we made electromagnets. We watched a video that I found on a google search on how to make them that I showed it to students (I have made them for several years but I was trying to show students how easy it was and if they forgot they could look it up). We read our RH assignment about electromagnets and their uses and then started to build our electromagnets.

Pictured above is the tray of supplies that each table received. We found that metal paperclips worked better then the plastic coated colored paperclips that I have pictured.

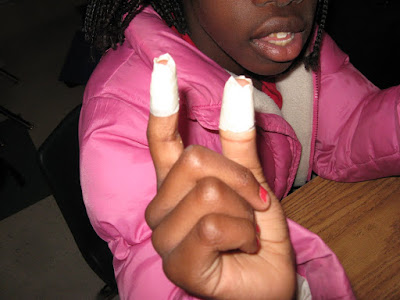
The tape on the fingers was an idea I got one year from another teacher. We have battery holders in our science kit but the clasps were hard for the students to use (discovered last year). The batteries heat up when held and the tape is a way to keep fingers from getting too hot. The students loved putting tape on their fingers and comparing how hot the batteries got (they never got hot enough to worry about...but you know how students over react :)

The next day we reviewed electromagnets, uses, and how to make (focusing on how to make them stronger and weaker - which is one of the standards).

Students made a foldable for the right hand side of their notebook. The cover had to have a picture of an electromagnet and under each flap they had to indicate what they could do with each of the materials to make the electromagnet stronger or weaker (pictures above).

Comments

Beth said…
What kind of wire did you use and where did you find it? I'm not finding suitable stuff. Help! :)
Eve Heaton said…
The wire I had was from out of our science kits but you can purchase an inexpensive roll of coated wire at any hardware or home improvement store fairly inexpensively. You will need to have a set of wire strippers (which I had in my kit but my husband also had a pair) to strip the ends of the wire to put in the battery holder.

Hope that helps! Good luck.

Eve

Popular posts from this blog

Picture of the Day - Activity

I attended a training class and a science coach shared an activity that he does with his students to help them differentiate between observations, inferences, and predictions. He puts a picture on the interactive white board as a warm up (he gets the pictures from a variety of sources but uses National Geographic's Picture of the Day a lot). The picture above is from the National Geographic site. He has the students make five observations. Then he makes the students make five inferences. Finally he has the students make five predictions. He does this every day and it really drives home the difference between those three key inquiry vocabulary terms. I've done this activity with both my sixth and fourth grade science classes and the students really got into it and became proficient at telling me the difference between those terms.

Weathering, Erosion, and Deposition Activity

I saw this activity at a science conference years ago and haven't had a chance to use it in a classroom until this week (mainly because I didn't teach weathering, erosion, and deposition). It is a great way to reinforce the definition of the weathering, erosion, and deposition in a highly kinesthetic manner. Basically you break the students up into groups of three. One group is "Weathering" another group is "Erosion" and the third group is "Deposition". Add tape to the back because you are going to stick them to the forehead of the children in each group. The "weathering" students get a sheet of paper that is their "rock" they will be breaking down. At the start of the activity the "weathering" students will start ripping tiny pieces of their "rock" and handing it to the "erosion" students. The "erosion" students will be running their tiny piece of "rock&

Bill Nye Songs with Lyrics

At the end of the Bill Nye videos he always has a fun song that goes with the episode. You can find many of the songs as stand alone videos on YouTube. This came in handy because today I am teaching a lesson on layers of the atmosphere and found a song from his Atmosphere video on YouTube titled "Fresh Aire." I really wanted to remix it and put the lyrics on the video (so the kids could sing along and see how the lyrics matched the lesson). The first thing I did was found a site that has all the Bill Nye lyrics posted used my YouTube downloader ( see instructions here ) and downloaded the song. I then imported the video into Movie Maker Live and used the caption feature to put the lyrics on the different frames (cutting and pasting from the lyrics site into Movie Maker Live). I saved the video and reposted to YouTube so other teachers could use the video with lyrics (the finished video is posted above). The process was pretty easy and I am thinking about doing it for more